Showing posts with label Social Media. Show all posts

Wednesday, 4 March 2015

How To Embed Twitter-Hosted Videos On Your Website?


Following along the same lines as Facebook, Twitter recently announced a video-hosting feature that lets you capture and upload videos using official Twitter apps without having to upload them first on a third-party service such as YouTube. This was indeed a welcome feature, and in sharp contrast to how Twitter had been predominantly text-based and monotonous in the past. However, as with any video-hosting service, you need a way to share that video elsewhere on the web.


For a video-hosting service, being able to embed videos is pretty important. If your videos can't be delivered elsewhere, what's the point? Not everyone uses Twitter to discover new content. Twitter's video-sharing lacked the embed feature for videos hosted on Twitter. You could embed regular Tweets, but not Tweets with videos.


Until now, that is.


Twitter has just announced a new embedded video widget, which works just like Twitter's official Tweet buttons and embedded tweets.


Embedding a video is as simple as clicking on the ����� button in the tweet and selecting �Embed Video�, as pictured in the image below.


Embed Twitter videos


Twitter will then render a piece of HTML code for you to copy and paste on your website. In addition to the video itself, the video widget will also display the full, original tweet.


If your website is built on WordPress, and you�re looking for a more intuitive way to embed video tweets into your posts, there�s another option for you.


Twitter recently came out with its own WordPress plugin that, among other features, includes the ability to embed video tweets simply by pasting a link to the tweet in the content editor. This works with some other video-hosting platforms as well, including Vimeo and YouTube.


WordPress has long had the ability to embed regular tweets just by pasting a link, and with the official plugin you can extend that functionality to video tweets.


Do you think Twitter hosting its own videos is a good idea?

Monday, 16 February 2015

How Snapchat Can Be Used To Grow Your Audience?


Snapchat


Snapchat is an exciting new social media platform through which people can send photos and short videos to each other. We recently talked about some of the ways you can market your brand on Snapchat. One problem for brands was, reaching out to their potential customers. Pulling contact numbers out of your marketing list was less than desirable. With a new update though, Snapchat has added the Discover feature for users to discover new content.

A potential growth opportunity for brands!


What is Discover?


The new discover feature gives users a new way to discover and explore content and stories from different editorial teams. This new tool was the result of collaboration between various media leaders to help build a story. Snapchat says the tool is unique...;


"...because it has been built for creatives. All too often, artists are forced to accommodate new technologies in order to distribute their work. This time we built the technology to serve the art: each edition includes full screen photos and videos, awesome long form layouts, and gorgeous advertising."


The discover tool can be found by clicking the bottom right corner of your open screen that leads to contacts and then clicking the purple circle located in the top right corner of your contacts page.


Personalized Ghost/QR Code


Snapchat has also released a new way to find followers. Every person on Snapchat now has his or her very own ghost. The ghost sits in the middle of a yellow box, which has several black dots. The dots are individual QR codes.


This means, that user can now take screenshots of their ghost, post it on social media and ask people to follow them. It also means that users can easily find brands on Snapchat and add them from anywhere their ghost is posted.


Snapchat Ghost


How does this work? A user simply points the camera at another person�s ghost and clicks on the white ghost in the middle of the screen. This will automatically add the user to their contact list.


Snapcash


Snapchat also partnered with Square, a payment processing app, to create Snapcash. Snapcash is integrated into the Square Cash Platform and allows users to connect their debit cards and send cash to other users. Once the debit information is connected to a Snapchat ID, users can send cash to other users by using their Snapchat ID. The user that was sent the money will receive an alert to their profile. If the user wants to accept the money, the user has to add their debit information to their Snapchat profile.


Business opportunities


Considering that most of Snapchat�s users never log out of the system and it is now the fastest growing social media app, it could hold many opportunities for new ways of crowdfunding from a highly engaged and committed audience.


We haven�t seen Snapcash live up to its full potential yet, because when Snapcash initially launched brands had no real way of redirecting the user from the message to the Snapcash function. Now that Snapchat has launched Discover and QR codes to each user, a brand can easily redirect people from one platform to Snapchat and then to Snapcash.


This new chapter is a refreshing one for Snapchat. It has made more room for advertisers to reach new audiences and to bring crowdfunding to an entirely new level. They have successfully created a platform that can be monetized without making users feel like they are being advertised to.


Do you think Snapchat has the potential to make it big? Let us know in the comments section below!

Tuesday, 13 January 2015

How To Post On Instagram From The Web?


Post on Instagram from web


According to a latest study by the Pew Research Internet Project, Instagram is now the fastest growing social network. Somehow Instagram has managed to find the right balance between social sharing, and social interaction. The result is a place that is growing in both capabilities and popularity, and drawing more and more non-conventional users to it.


This makes it a great time to be marketing yourself. Here are some tools to enhance your Instagram experience. With their help, you can use the service from your computer as opposed to just from a smartphone, schedule your posts, and more.


Latergram


The idea is pretty simple. You upload one or multiple images/videos from either the web or phone. You set a schedule so they are released as you want them to be. You can then get the images pushed to your phone, if you choose. You will get an alert just prior to scheduled posts publishing, so you can either change/erase the post, or verify it.


Latergram


Because you have to authorize the publishing at the time it is scheduled, this is more a way of monitoring your posting calender than an autoposter. But for those who want more control, it is a great tool.


Schedugram


  • Schedule Instagram updates from mobile

  • Post and schedule Instagram updates from the web

  • Multiple Instagram account support


Just want something super simple that schedules and auto-posts photos and videos, then lets you know? Then this one might be for you. Upload via you browser, manage multiple accounts, and allow multiple administrators access. Once the scheduled posts have been published, you get an emailed alert. So any time there it a problem, you will know right away.


Best of all, there is multiple upload support. So you can put a bunch of photos or videos on at once, edit the information like meta data, and then schedule them all at once. This is so much more efficient than doing it one by one.


Do you have any tips for running an Instagram account? Let us know in the comments!

Sunday, 4 January 2015

Pinterest Rolling Out Promoted Pins For Marketers


Pinterest for Business


Pinterest is so much more than just sharing images. Think about it; people on Pinterest are more interested in what they want (probably in the future), as opposed to what they're doing (as on Facebook, Twitter etc.). And with Pinterest Guided Search, users can look through billions of pins to find things they've probably never seen before! This makes Pinterest the perfect tool for marketers. Pinterest has announced that it will now start rolling out promoted pins, so that marketers can fully benefit from the network.


Imagine looking for possible birthday gift ideas, or new home decorations, or even cooking up a new dish. Now imagine you're running an online gift shop, decorations store or a cooking channel. Pinterest is a great way for people to discover new things, and with the right effort, you can connect millions of new customers with your business.


Pinterest introduced the Promoted Pins feature a while back, but it was still in its beta. Starting with the new year, Pinterest has announced that it will be making the feature publicly available for all, so that more and more people can benefit from the power of advertising and connect with new audiences.


Starting January 1, �reservation-based� Promoted Pins will be available to all US users. The model is CPM-based, meaning that advertisers are charged based on the number of impressions of their promoted pins (i.e. how many people have seen a pin).


Why Promoted Pins?


  • Promoted Pins perform as good or better than organic Pins.

  • Brand advertisers achieved about a 30% bump in earned media from people who saw a Promoted Pin and saved it to one of their own boards.

  • Promoted Pins are repinned an average of 11 times or higher.

  • Promoted Pins continue to draw engagement from users even after a campaign has ended.

  • Businesses outside of Pinterest�s core categories were successful with Promoted Pins.


In an effort to make itself even more of a useful marketing tool for businesses, Pinterest is introducing what it calls the �Pinstitute� � a new program for businesses to learn how to connect with users and see an even greater return on investment.


Through two tracks focused on creative and measurement, you can learn what kind of Pins perform well, what users care about and what kinds of products Pinterest will be rolling out in the future.


A select group of brands and agencies will be invited to attend quarterly Pinstitute workshops. If you�re not among that select group, Pinterest will also be rolling out a series of webinars and other online learning tools for small businesses.


Now might be a good time to get on the Pinterest marketers' bandwagon while it's still new :)

Monday, 1 July 2013

Add Twitter Cards to Blogger Correctly

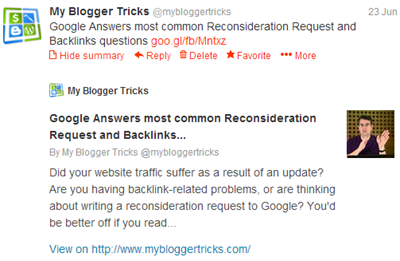
twitter cards for bloggerMost of you asked how do we add a "View/Hide Summary" link below our tweets. If you click the summary link it will expand and show the post description snippet, along with a thumbnail image, Page title and twitter account attribution. We achieved it by integrating "Twitter Summary Cards" with Blogger. Twitter card is not a new name because they were introduced last year and the reason we never talked about it was due to unavailability of custom XML tags in blogger code library. The image thumbnail tag provided by blogger is of small resolution i.e. 72 x 72 pixels and unfortunately Twitter still has problems fetching the thumbnail correctly. This made it difficult to implement twitter cards for blogger.

The thumbnail displays fine on Twitter testing page but fails to appear on twitter page. Somehow we at least succeeded in fixing the problem with embedded tweets as you will see in demo.  Due to low resolution thumbnail sizes we can not install meta tags for Large Image Summary Card in Blogger but we can surely add Summary Card that works fine with small resolution images. We termed today's tutorial "correct" because most of the  methods that we found so far were not well wrapped in with conditional statements and this made the Template Header full of a large clutter of META Tags which is not good for SEO of any site. The same mistake is seen for OpenGraph Tags which I will be covering in another tutorial. Lets first read a little theory before jumping at the tutorial.

To see the demo visit our twitter page: @MyBloggerTricks

Below is a live demo for an embedded tweet:

Difference between OpenGraph Tags and Twitter Cards?

We honestly find it completely meaningless when twitter introduced beta version of these new tags in 2012 because we already had Facebook OpenGraph Tags that are widely used even today and works just fine in fetching the right Thumbnail, Description and title. OpenGraph tags are used even by GooglePlus to fetch required data and twitter also used it. Now twitter has started a whole new crap that I hope may not encourage every new social media network to come up with their own custom meta tags. I just hope Google does not follow this trend. Else we will be forced to add bulk of meta tags for each giant online. Twitter cards are surely a bit different and creative but fundamentally speaking they serve the exact same purpose as OpenGraph tags do which were introduced by Facebook.

Following is the list of six twitter cards being introduced by twitter in order to display user content in a more friendly way on Twitter accounts.

  1. Summary Card: Default card, including a title, description, thumbnail, and Twitter account attribution.
  2. Large Image Summary Card: Similar to a Summary Card, but Features bigger size images.
  3. Photo Card: A Tweet sized photo card.
  4. Gallery Card: Displays a collection of photos.
  5. App Card: Displays application profile.
  6. Player Card: A Tweet sized video/audio/media player card. You can now watch YouTube videos live on twitter! Probably the best card for podcast blogs. Instead of summary link you will see View/Hide Media link here.
  7. Product Card: It represents product content in a more better way.

Why this Method is Correct?

We are utilizing dynamic conditional statements available in blogger that checks for a selected data and displays the content only when the required condition is met. The code shared below will check for a Homepage logo and also Post thumbnail based on right condition. The thumbnail data variable does not work for index page but works only for item pages. As a result if you specify the following data type for thumbnail:

data:blog.postImageThumbnailUrl

then Twitter will not display a summary card for homepage but it will for item/post pages. In order to fix this problem, we have set careful conditions, which work just fine and also produces a compressed code.

Further instead of manually adding Title and description for homepage, we have used variables that automatically does the work.

Install Twitter Cards on blogger

STEP#1

Follow these easy steps.

  1. Go To Blogger > Template
  2. Backup your template
  3. click Edit HTML
  4. Paste the following Meta tags anywhere below <head>


<!-- Twitter Cards For Blogger by MBT -->

<meta content='summary' name='twitter:card'/>
<meta content='@mybloggertricks' name='twitter:site'/>
<meta content='@mybloggertricks' name='twitter:creator'/>

<b:if cond='data:blog.pageType == &quot;index&quot;'>
<meta expr:content='data:blog.url' name='twitter:url'/>
<meta expr:content='data:blog.pageTitle' name='twitter:title'/>
<b:else/>
<meta expr:content='data:blog.homepageUrl' name='twitter:url'/>
<meta expr:content='data:blog.pageName' name='twitter:title'/>
</b:if>

<b:if cond='data:blog.metaDescription != &quot;&quot;'>
<meta expr:content='data:blog.metaDescription' name='twitter:description'/>
</b:if>

<b:if cond='data:blog.postImageThumbnailUrl'>
<meta expr:content='data:blog.postImageThumbnailUrl' name='twitter:image'/>
<b:else/>
<meta content='YOUR-BLOG-LOGO' name='twitter:image'/>
</b:if>
<meta expr:content='data:blog.homepageUrl' name='twitter:domain'/>

Make these changes:

  • Replace mybloggertricks with your twitter username for blog profile
  • You can replace mybloggertricks with either your personal twitter profile or your blog profile. I chose blog profile. For Multi author blogs like in wordpress you can choose to show author twitter profile for each twitter card.
  • Replace YOUR-BLOG-LOGO with your Logo Link

    5. Save your template and you are half done!

STEP#2

The final step is to verify your twitter card settings. It is really easy, just follow these steps:

  1. Open Google Chrome or Safari (Twitter cards work on webkit browsers only not Firefox)
  2. Go to Twitter Card Validator
  3. Double Click Summary on the popup window
  4. Click the Validate and Apply  tab
  5. To see you have added the code correctly just enter your homepage link inside the box and hit go.

twitter card validation

    6.  Do the same for a post Page. Select any post (which contains at least one image and search description) from your blog and test it to see it also gives the right post title, thumbnail and description. If you get a red error for twitter:description , then probably you have not added Post description. Just don't worry about it because I will tell you in next step on how to fix that.

    7. You will see a red link that says that your site is not approved, simply click it and fill up the form to submit your request for Twitter card approval.

Twitter would say that they would send you an email but they really don't do that. At least I have not received any email for our three blogs. They get approved automatically within 48 hours. Once you see summary link below all posts know that you are all set up!

Requirements:

There are two requirements for twitter cards to work properly in Blogger:

1. Always add Search Description for Posts

If you don't know how to do it or if you don't have the "search option" inside blogger post editor then you can simply optimize your blog and add the required code by following this tutorial.

2. One Image inside posts

In order for twitter to display the thumbnail, you must make sure to add at least one image inside your posts. This image can be uploaded anywhere you want. There is no requirement that it must be uploaded through blogger editor only or on picasa web albums. All that is required is an image inside a post and nothing else.

Need help?

This tutorial is made as easy and informative as possible. If you still faced any problems, then don't troubleshoot yourself and let us know for any help needed.

Free Tip: Wordpress users can install JM Twitter Cards  for any framework, be that genesis or thesis.

Peace and blessings dear buddies :)

Thursday, 13 June 2013

Connect Twitter To Feedburner Directly without using App!


FeedBurner-Twitter Integration


A few years ago, Google FeedBurner had a Socialize option that let people share their blog posts (RSS) directly on Twitter. But this service was depreciated, and people started using third-party apps such as twitterfeed instead. While these apps work fine, they leave you somewhat dependant upon them. Now though, it seems Google is throwing a new line out for Bloggers who'd like to share their RSS feeds to Twitter directly, because the Socialize option is coming back! This indeed marks another step forward for Google/Twitter Integration. Now, you can share your blog posts (RSS feeds) to Twitter without any third-party apps!


Remove third-party apps from Twitter


First of all, to avoid any redundancy, you have to first remove any auto-scheduling apps for Twitter. To do this, log into your Twitter account, and click on the gear icon on the top-right corner. Then click Settings. Now, from the left sidebar, click on the Apps tab.


Here, you will see all the Apps that you're using with your Twitter account. Next to each app is a Revoke Access button, which essentially deletes the app. Delete any scheduling apps you're using to auto-share your blog posts to Twitter, such as twitterfeed.


Revoke access to twitterfeed


Share updates using Socialize


Sharing your updates on Twitter is now easier than ever. To use Socialize, follow these steps;


  • Log into your FeedBurner account, and select the feed you want to share on Twitter.

  • Click on the Publicize tab

  • Click on Socialize from the left sidebar


Socialize


  • Click on Add a Twitter Account 

  • Authorize the app for your Twitter account, and you're all done!


Now, whenever you publish a new blog post, your FeedBurner will be automatically updated, and once that happens, the update will be immediately echoed on your Twitter account.


Got any questions? Feel free to ask in the comments below. Also tell us how you're sharing your blog updates on social medias like Twitter and Facebook. Cheers :)

Friday, 17 May 2013

Success Secrets of Pete Cashmore who started blogging at age 19


mashable and pete cashmoreFor any field that you might pick for yourself, has its own benchmarks of perfection and if you talk about blogging, Mashable is a winner here. No matter which niche you choose for your blog, there is no doubt that the best place to grab your hands on the latest news related to the online world and social media network is mashable. We have been advising our newbie readers to keep their eyes on sites like mashable as following sites which breaks headlines is something that always brings you not only a boost in readership, but also a quick revenue.


What I now believe after reading many success stories is that entrepreneurs are born that way actually, and a good example here is of Pete Cashmore, the mashable-man!


Mashable-The Inside!


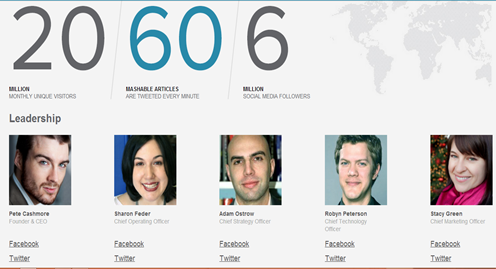
Covering every minute aspect related to social media, technology, news and what not, Mashable is the largest independent online news site. The site that was launched back in 2005 is now enjoying a respectable alexa rank of 361, with more than 20 million unique visitors a month and 6 million social media followers. What makes this site unique is its reliability and quickness when it comes to cracking the latest news. Mashable is now headquartered in New York City and also has an office in San Francisco.


Secret#1 : Pete Cashmore and his childhood!


Pete-Cashmore


There is one thing very special about the fortunate people; they experience something misfortunate and that very incident becomes a turning point of life. What made Pete Cashmore what he is now, was his surgery of vermiform appendix at the age of 13. Although the surgery was a complete success, the recovery was even harder and due to his illness, Pete had to skip his school for complete rest. While being at home, he started peeping in to many blogs and started learning from what was shared on those sites.


Secret#2: Pete never told parents until his first success!


Been locked in a room, all busy with your machine and doing something attentively makes parents suspicious, and that�s true, isn't it? However, Pete was a lucky one here; probably some credit goes to his illness too that his parents never questioned him about what he was up to all day long. All that they predicted was that Pete was busy in something and wanted to make some money online.


Secret#3: Mashable born at the age of 19!


In 2005, after learning all that was needed, Pete founded mashable that primarily focused on social media and technology initially. He was only 19 at that time and was living in Scotland with his parents.


Secret#4: Pete hasn't slept at nights since a long time!


After getting a considerable response from his home country, Pete realized that targeting Britain only would not work and for that he planned a different strategy. As much of the work was done in America, he decided to reschedule his life to be available on those hours that could bring better results by targeting audience from America as well. If you are a pro-blogger, you must have understood his logic behind doing so, time really matters!


pete cashmore


He started writing and posting at night and used to sleep few hours in the morning. Most of us, whether it be students or bloggers know how bad it really is to be up all night and compensate the loss in daytime.


Pete, in an interview shared:


'Cause I quickly realized, Well, Britain's not gonna be a big enough market, and most of the stuff is happening in America anyway. So, I need to be on those hours. So, maybe I'd go to bed at 6:00 AM, 7:00 AM, maybe I'd be up by mid-day and writing again, and every time that just burned me down. What I would do at weekends, I would... Friday night I would say, okay, there is no news that's gonna happen, I would just sleep all of Saturday, I'd wake up on Sunday morning. And hopefully, I had recovered enough that I could start blogging again, 'cause the news cycle doesn't stop, and I went on for a long time. That was probably 18 months or so, when it was just me up at bizarre hours. Sleeping in the morning, not getting any sunlight, and it really drains you.�


Secret#5: Success in 18 months!


It was amusing for him also to figure out mashable�s popularity and the fact that there were about two million people reading mashable content a month by the end of 18 months.


Secret#6: �Have I beaten Yesterday?�


pete-cashmore-founder-mashable


Every successful man has got his own rules to follow and Pete has this question to answer daily. He revealed once that what matters to him is the fact that whether his today is better than his yesterday or not! If yes, it�s a satisfaction!


Secret#7: Mashable-a team of more than 50 people!


mashable


When your work gets recognition, you need to produce even better. Being all alone in a business might help you in keeping all the revenue with yourself, the revenue been generated, however, is pretty less. Pete has now more than 50 people working for him and enjoying a reasonable share in the returns.


So, that�s all for now, but there is one thing for sure, Pete is one of those lucky people on earth who find their talent at initial stages of life and learn how to cash it.


More power to him,


Wishes


Saturday, 13 April 2013

Now Check your AdSense Earning Reports inside YouTube Analytics!


YouTube


Are you a registered YuuTube partner, or aspiring to be one? YouTube Partners are high earners who make a living out of their passion for creating videos. And some are pretty good at it too. Thousands of people are now capitalizing over this opportunity. For them, the AdSense and YouTube teams want to make things easier, since a lot of them are giving feedback. And Google listens to feedback. So to make things easier, YouTube has now integrated your AdSense earnings right into its analytics, which means that you can now check your AdSense earnings from your Videos from inside YouTube analytics!


Previously, AdSense for Content Host earnings for partners were calculated and displayed inside the AdSense accounts. Now for a blogger (using Google Blogger or something), this might not have been a problem. But YouTubers don't especially like to go all the way to AdSense t check out their earnings, especially if the only source of their revenue is YouTube. Now though, with this latest update, such people can view their earnings without leaving YouTube!


YouTube Analytics


YouTube Analytics will now display accurate and consistent performance data for your videos. This won't change the way you are paid. You will still be paid via AdSense, and will see monthly earnings and other data you see on AdSense. The difference now is, you will get more comprehensive details about the sources of income for your videos.


The timeliness of earnings reporting has been improved to 24 hours after the end of the day, but you can still see page views and clicks. You can also review ads and manage ad blocking for your videos, just like in AdSense.


For YouTube partners, there are two major forms of income. Auction-sold ads, and reserve-sold ads. The auction-sold ads went to AdSense earnings before, and reserve-spot ads went to YouTube earnings. Both AdSense and YouTube reported their own respective earnings. But now, all earnings related to your videos have been integrated into YouTube to form a more streamlined feature which will help you keep track of your total earnings and your video performance better.


This new feature is aimed at reducing confusion, and helping YouTube partners grow by making things simpler for them, leaving them to focus on their video performance. Are you a YouTube partner? How do you like this new change? Leave your interesting comments below. And feel free to ask any question too.


A humble request: Please try to stay interactive when you post your comments, and avoid promoting your respective blogs and/or websites. We respect your right to advertise yourself, but our aim is to build an interactive community, where people interact with each other, rather than promoting their respective web domains. And please, also avoid the cheesy and artistic signatures, as they can be considered akin to spamming. Please also understand that this request comes from the fact that we want to respond to every comment or question you might ask. And if you spam and leave out cheesy comments just for the purpose of promoting yourself, then this hinders the conversation process. Hoping for your co-operation. Thank you :)

Wednesday, 20 March 2013

How To Schedule Pins on Pinterest?


Scheduling pins on pinterest


Pinterest is a pretty interesting visual social network that poses quite a conundrum. On the one hand, the idea of pinning and sharing images, and interacting with people over these images seems quite appealing. But on the other hand, there aren't very many marketing features employed by Pinterest, which causes some small businesses to ignore this really useful opportunity. With Facebook, you can schedule your posts, analyze your statistics, and generally spice up your posts. Sadly, no such functionality as stock from Pinterest. Luckily though, there is a tool that will help you schedule your Pins, and enhance/analyze them for more effectiveness.


Scheduling pins using Pingraphy


Pingraphy is a free tool that is designed to add an extra layer of features to Pinterest. You don't have to create a separate account to be able to use it. You can just log in with your Pinterest credentials. Enter your Pinterest username and password, and then proceed to the next step.


When you log in for the first time, you are prompted to add a Pingraphy bookmarklet to your browser. Just click on the button that says 'pingraphy' in Step 1, and then drop it into your browser bookmarks bar. This is a piece of JavaScript code that will help with the easy sharing of pictures you find on the web. This, however isn't necessary. But I did this anyway.


Next is Step 2, where you actually get to post or schedule pins. Click no the Schedule button, and you will see some more options. You can select a board to pin to, the picture to pin, and when to pin it. If you click on the schedule button, you will see options to set the time, and the time interval (in case you want to pin multiple images). If you want to pin multiple images at once, you will still have to set an interval. This interval can be as long or as short as you like.


Once scheduled, you can see your pins from your dashboard. Unfortunately, you can't change the schedule for a pin, and have to delete it and then schedule it again properly to change its time. But otherwise, it's a pretty useful tool that can help save a lot of time on Pinterest, and manage pins more effectively. Check it out for yourself, and let us know what you think. Cheers :)


Thursday, 14 March 2013

How to Verify Your Site with Pinterest to access Web Analytics?


Verify your website with Pinterest


Pinterest is a relatively new social network that revolves around the concept of image-sharing. With over 50 Million active users, it is fast becoming the largest such social network, which gives site owners and webmasters a good reason to get their websites verified with Pinterest. Recently, I wrote a post about Pinterest's latest Web Analytics program, after which a lot of people asked me how to get your site verified with Pinterest to access this analytics feature. So here's my attempt to answer the question, and tell you a bit about why you need to verify your site with Pinterest.


Verifying your site


To verify your site, go to your Pinterest profile. Click on the arrow next your profile picture on the top-right, and select Settings from the drop-down menu.


There, you'll find a website field. Enter your website's complete URL in that field, and then click the Verify button right next to that field.


You will get an option to verify your site by uploading an HTML file. This file will be given to you once you click on the verify button. Download this file, but don't close the Pinterest verification page. Go to your website's Cpanel or FTP account, and upload that HTML file to your root directory (www.yoursite.com/). Once you're done, go back to the page you were on, and click on the 'Click Here' link given in step 3 to complete the process.


If you run a Blogger blog, or some similar platform where you can not directly upload an HTML file, then you can go into your site's source code (template, or theme code), and upload a meta tag provided by Pinterest. You can get to this option from the same page as HTML file upload verification. Just click on the link at the bottom that says Verify with a meta tag. You can add this code in the header of your website.


Why verify your site?


For one, website verification establishes a link between a website and a Pinterest account. Accounts linked to a websites have more authority. These accounts are marked with a checkmark which displays next to their website on their profile page and below their name in search results


Besides, after verifying your site, you can access Pinterest Web Analytics which can give you insights into how well your content is doing, and what content is working and what isn't.


So get your website verified right now, and if you face any problems, just leave us a comment, and we'll try to reply it as best as we can. Cheers :)

Tuesday, 12 March 2013

Pinterest Introduces Web Analytics to help out Webmasters


Pinterest Web Analytics


Pinterest has gained quite a bit of popularity over the course of its life, short as it may be. This image-based social media is a great way to share pictures you like with other people. A lot of the pins, or image shares on Pinterest come from other websites, from where people can easily pin pictures in much the same way they can Like or +1 a post. Since so much of the data on Pinterest comes from outside sources, Pinterest has finally decided to launch a new Web Analytics program which will help website owners understand what sort of images interest people, and how best to harness their potential streams of revenue.


"The goal is really to help websites understand what content is resonating with people on Pinterest," Cat Lee, Product Manager, said while talking to Reuters. Pinterest has laid out all the ground-work to monetize its popular pinboard-like service. It is a free service to start with, but experts believe that it might start drawing revenue by providing premium services to business in the future. This is backed up by the fact that Pinterest has a large following, and is being heavily used by popular retailers such as Dell, The Gap, and Patagonia etc.


What can you expect?


From Pinterest, you will have access to a variety of analytics data regarding pins from your website. For example, you will be able to see how many people pinned from your site, how many people saw those pins, and in turn, how many actually visited your site. Besides this, you will also see your most pinned, most clicked, and most recent pins. This will give you an idea of what is popular on your website, and what isn't.


To access Pinterest Analytics, you need to verify your website. If your site isn't verified, you need to visit this verification help page from Pinterest, and then get your site verified in very simple steps. Verify your site now, and if you have a confusion, feel free to ask us.


Once verified, go over to your Pinterest profile, and switch to Pinterest's new look by following this link. Once this is done, visit your Pinterest again, and look for the Analytics option in the top-right corner.


You will now have access to your website's analytics! Explore the, all you like, and see what you can do to improve your content. If, for some reason, you have problems accessing your analytic, please tell us about it. We'll try to help as best as we can. Peace :)

Thursday, 28 February 2013

HootSuite For Blogger - Install the App Now!


Connect Blogger to HootSuite


Probably one of the best things about blogging in this age has to be the level of automation you can get nowadays. Long gone are the days when you even had to add html styles in your posts by hand. It is amazing how easy things have become today. You might already be familiar with social media automation, and how you can cross-publish your posts across multiple platforms. HootSuite is one application that's pretty well known in this regard. Well, now there's good news for bloggers! HootSuite has finally been integrated with Blogger! Now, you can automate the whole blog posting process right from where you manage your social media!


HootSuite is a very popular application that connects with all your social media profiles, such as Facebook, Twitter, Google Plus, and so on, and amalgamates them all into a single dashboard from where you can update them easily. It gives you powerful features, such as scheduling your posts, cross-publishing on multiple platforms, and more, all from the convenience of a single browser tab!


HootSuite integrates with Blogger!


This functionality has now come to Blogger! You can now update to Blogger, and more, right from your HootSuite dashboard! I, for one, was really looking forward to a solution that'd allow me to create and manage Blogger posts right from where I manage my social interactions. Now that this feature is finally here, let us look at what you can do with it.


  • View content - You can view all your published content, posts, and even pages right from HootSuite. You can also see the comments on your posts and pages.

  • Create posts - As mentioned already, you can create and edit your posts in the stream. No need to visit Blogger separately for managing your blog posts.

  • Share content - What better way to share your blog posts than on social media right from the number one social media manager? You can use HootSuite to easily share your posts and pages to your connected social media networks.

  • Multiple blogs - Instead of just one, you can monitor multiple blogs that can be affiliated with different accounts. 


Join now!


You can connect blogger simply by signing into the social media management dashboard that is HootSuite, and then adding Blogger easily from the dashboard. Alternatively, you can visit HootSuite's app directory, and click on the "Install App" button right below the Blogger icon.


HootSuite app directory


HootSuite also held a Google+ hangout on the 28th, where they talked about Blogger integration with HootSuite, and also gave a live demo. MBT was especially invited for this event. And it was pretty informative, especially since there was a Q&A session at the end, where people asked some useful questions. Here is the link to the hangout.


So, do you like HootSuite? Try connecting Blogger with it, and let us know what you think of it! Happy blogging :)


Monday, 14 November 2011

Pakistan Blog Awards: Its Time To Show Love And Vote For MBT!


Its Huge!surprised Its really an honor for me to present Mybloggertricks's success to the world of blogging here today. There are great bloggers around the world that have served there lives for blogging and bringing the best content to the loyal visitors.


There is a series of rewards for every field in the world that we wish to work in. May it be video gaming or the world of showbiz. A single Oscar award on any artists portfolio could change his life. So is the case with Pakistan Blog Awards 2011.


The contest was first time held last year in Pakistan (2010) where great hard working minds got exposure of the international market. Pakistani bloggers could register their blogs in the contest. There are total of 33 categories namely:


1. Best Humor Blog

2. Best Online Community Blog

3. Best Political Coverage

4. Best Celebrity Blogger

5. Best Social Activist Blog

6. Best Fashion Blog

7. Best Travel Blog

8. Best Diarist

9. Best Gossip Blog

10. Best Literature Blog

11. Best Technology Blog-Local Technology

12. Best Technology Blog-International Technology

13. Best Sports Blog

14. Best Business Blog

15. Best Marketing Blog

16. Best Education Blog

17. Best Science Blog

18. Best Healthcare Blog

19. Best Food Blog

20. Best Urdu Blogger

21. Best Sector Coverage Blog

22. Best Photo Blog

23. Best Culture Blog

24. Best Video Blog

25. Best Music Blog

26. Best Corporate Brand Blog

27. Best Current Affairs Blog

28. Best Use of the Urdu Language in a Blog

29. Best Youth Blog

30. Best Blog from a Journalist

31. Best Aggregator Blog

32. Best Infotainment Blog

33. Best Regional Language Blog


Mybloggertricks has been registered in the Best Technology Blog-International Technology category. Let us all join our hands and give back something to Mohammad, what he deserves.


Mohammad started blogging back in 2009 officially with Mybloggertricks, and gained exposure through his other previous blogs. After all every body starts at one time. Right? Now many people around the net praise him with this efforts over Blogger tutorials and Social Media.


Where MBT Stands?


It was his vision, curiosity and non the less his aim to lead the race, brought him to this position today in the blogosphere. Mybloggertricks rose from 63k to 10k Alexa, (Alexa recorded from where he left for exams) within 3 months time span! That could not have been possible without you guys and the love that you people have showed through lovely comments.


With the grace of Almighty,  MBT now stands on Page rank 4 with a place in DMOZ directory. Mohammad has also worked hard with the widgets, templates that he gives out for free to his loyal readers. The email subscribers have reached a stunning 4553!


Connection to Social Media have always been a strong side of MBT. People like to connect and read the latest in and outs of Blogger tricks/Social Media through Facebook/Twitter. A total of 3553 People liked and showed their love through Facebook. 1396 Twitter users thought it was a good idea to follow MBT. Along with 571 Google friend connect followers.


The recently opened Google+ profile is also blowing away with Mohammad being in 507 circles world wide.


Hats Off dude!


Muhammad's Side Plans


As always, he has been working on providing insights of blogging success that has rarely been shared by others. No one would mention you to check out you post frequency. Instead, you would often listen about back links etc.


In the future, we all be seeing another great project i.e (www.bloggersetup.com), which would be first blog management premium service offering design and SEO services with life time consultancy.


People would be lucky to get his sincere advices :)


Time To Return Something smile emoticon


Winning in Pakistan Blog Awards mean a lot. It could bring Mohammad to the eyes of Industry. Sure that would help him in his future prospects. All we have to do is to go and vote for MBT @ Pakistan Blog Awards Page.


As a part of MBT i would recommend 5 Stars for our brother. Also leave out a lovely comment and mention how you feel about this brotherly community that we all have created over the time.


Spread The Word!


You know the power of mouth. Don't forget to share the link below with your friends.


http://pakistanblogawards.com/2011/11/13/technology-blog-%e2%80%93-international-technologies-mohammad-mustafa-ahmedzai/


You could also share this particular post @ Facebook, Twitter.


Lets join our hands and make it sure that we give Muhammad a warm welcome when he arrives back from his exams.


**Cheers**


Guest Post by Hassam Ahmad Awan. MBT's Gold Star Guest Author.

Tuesday, 8 November 2011

Make a Free Android Application for Your Blog


make android appIn this post i will teach you how to make a free App of your blog for Android and Nokia Touch Phones. First little description on its importance :

As we all know that Mobile Internet is getting more craze from Internet Users. Many people just use their Mobile Phones to surf internet. An App is a shortcut for a user to search for his requirement. Such as a currency converter app makes it easy for a user to get the results fast either by going to internet explorer and surfing internet to find your currency rate.

I personally build an Android and Nokia Apps of my Blog and it really help me little in my traffic but more than traffic, it gives your Blog a professional Look. If your app receives good stats than you can have an Advertiser to make some revenue from your App. Now let's get started!


Those who have not yet read the Tutorials, please first read them :


  1. How To Make Android App

  2. How to Make a Nokia App

  3. How To Publish Android App in Android Market?

  4. How to Make Money By Making Android App?


Building an Android App


1- First of all go to ibuildapp.com and go to Account Login


log in ibuildapp

2- No need to create account, simply Log in through your Facebook account.

3- Click on CREATE APP

4- Continue with Native iPhone/Android App

5- Now you will see a list of different menus. Simply scroll down and select CUSTOM APP and continue.

6- Give your App a name ( Note: This name is shown on Phone. For Example : Camera ). Select Android and continue.

7 - Now the work is very very very easy :) First see the picture below.


ibuild app tutorial

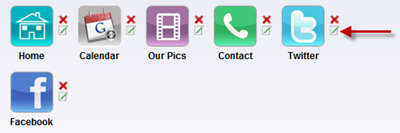
8- Choose a Logo, change Background Image ( You can upload your Own ). Now you have Six options as you can see on the left side. It is a Live Demo where you can test your app. Remember, you must have this Six Options, you cannot delete any otherwise you cannot proceed further. You can change the Icons, their names and functions.


app options

To change the icons, click on edit and change the name and icon.

9- To change the functions of these icons, click on any icon on the live demo and than click on CHANGE PAGE TYPE to see the list of different functions. Give a title to your Page Type.


android app building

android functionality


NOTE: When adding Twitter or Photobucket feed, you have to validate it first from feedvalidator . You will get a new URL and you have to use it. 

And in case of RSS Feed Burner URl, u have to add.


http://feeds.feedburner.com/TntByStc?format=xml


Replace TntByStc with your feedburner title. The Red one is extra code to run it on the App


Now i will show you my customized App


build android application


As you can see i put the above options. I uploaded my own icons and gave them a unique name and changed their functions from default. The home tab is my feed burner Url. My readers can easily read all the latest news through this app. Also i placed Facebook page, Contact and Website. You can customize it as you want. Just choose from the menus mention in step 9 and place whatever you want. After every change do not forget to SAVE. After completing all the six features, save your app and hit continue.


10 - Next step is your APP Setting. Choose Android option and a beautiful Splash screen. Leave the Advertising option with NO because the other options are useless because if you have to join those ad networks than your app should have huge stats which at time being you do not have because your app is not published on Android Market so leave it with NO but if your app gets good stats than you can get Advertisers as you can see the fourth option ( HTML - create custom ad ). You can place advertiser's banner with his URL. To use Ad Networks, you must publish your App in Android Market ( Further written below about Publishing the app in Market )

11- Save and Continue

12- Now give your app some Information


make android app

App logo is that logo which appear on Phone

13- Save and continue to the next step of Notifications. After giving a Notification message, continue to the next and final step.

14- I do not have to explain this step :) it is very easy and you can follow the instructions given to you by them.

YOUR APP IS READY ! But you must try it first with Live Demo From MY APPS link.

Now some important things: If you wish to publish your app to android market, you have to pay a one time fee of 25 dollars but it is not necessary because you can download your app and can upload it on any file hosting and than you can give that link to others. You can test my app on your Android Phones or you can test my App Online


If you wish to make changes to your app than you can do it by going to My Apps Link and than click App Management. You do not have to download the app again and again after every change. The change will happen automatically to all the users because this app is connected to internet.


Now you can share this app with your readers. Enjoy :)


Guest post by Haider Afridi. Running a Fan Club on Celebrity Salman khan at skfanclub. You can contact him @Facebook

Monday, 31 October 2011

Facebook 'Trusted Friends' And 'App Passwords' Features


Facebook security issues

Over 600,000 Facebook accounts are compromised each day in result of hacking/forgetting passwords. Facebook security has been an issue from quite a while now, with increasing concerns over the privacy issues. Recently Facebook launched these 2 new features (options) as a part of their fight against account hijacking.


As per Facebook, their workers/engineers are working pretty hard to solve the issues and to provide a smoother site experience:


Security and safety are at the core of Facebook. We have entire
teams dedicated to building tools that give people even more control
over their account and specifically the way they access their
information. In fact, many of our most talented engineers are working
exclusively on creating a secure environment on Facebook.


Lets see what the two new features are about.


Trusted Friends


Say, you forgot your Facebook account password. What you do next? Go out for 'forgot your password' option, right? What if you forgot the password of  the email that you have provided for the back door access too.


Now this is where Trusted Friends play their part. I believe this is a great improvement in the back door solutions from Facebook. You simply have to select a couple of your close friends, say 3-4, in Trusted friends option.


facebook security codes


Now when ever you have to access your account in hard times, simply ask the password and other details that Facebook has emailed to your close friends. Thats pretty much it.


Facebook says:


If you forgot your password and need to login but can't access your
email account, you can rely on your friends to help you get back in.  We
will send codes to the friends you have selected and they can pass
along that information to you.


To select your 'Trusted Friends', go to your Security Settings. (Account > Account Settings > Security).


App Passwords


The second feature is being the 'App passwords'. We all use a bunch of applications on Facebook. Many of them ask to login with Facebook credentials. So, this new features allow us to generate random passwords, for the apps we select. That would keep our original logins safe from the third parties.


facebook app password


From Facebook blog:


Simply go to your Account Settings, then the Security tab, and finally to the App Passwords section. You can generate a password that you won�t need to remember, just enter it along with your email when logging into an application.


I hope these features would help to improve account mishaps in future.


Guest Post by Hassam Ahmad Awan. MBT's Gold Star Guest Author.

Wednesday, 26 October 2011

How To Revert Back To Old Blogger Profile From Google+ Profile?


blogger profile to google+ profile


Yesterday, at MBT you guys learned how to switch your blogger profile to Google+ profile, overwriting your present Blogger profiles. Google is interlinking all its services in a unique manner. Previously Blogger profile was a totally different thing from your Google profile.


Now that you have your Google+ profile, it would be easier to manage things around. The profile would act as one single page (Google+ profile page) that would portray you and your circles.


As in the previous post, it was mentioned that you could revert back to the old Blogger profile in case you don't like the change. People normally resist change. But i believe its a good one and should be tested. You would always have the chance to revert back, that we are going to discuss today.


Note that the revert link that ill provide in a second, would only work if you have switched over to Google+ profile from Blogger profile, (obviously). How could you revert something that you haven't done :)


So yeah, go to revert-profile link and follow the instructions there on.


After the revert process has been done, a notification would appear on your Blogger Dashboard.


blogger profile to google+ profile

 So that's it. Wasn't that easy? Tell us whether you would like to revert to the old Blogger profile or the new Google+ servers you better.


Guest Post by Hassam Ahmad Awan. MBT's Gold Star Guest Author.

Tuesday, 25 October 2011

Iranians Reservations Over Google Reader Overhaul


google reader

2011 has proved to be a major year for Google products. There were new things introduced, with the most prominent being Google+. Google has to make it sure that its new social network is a success, as the previous attempts to build up an effective social network (Orkut, Google Buzz) were some how thought to be failed.


To make the success obvious, Google is integrating its new social platform within its every product, to give a new feel, to how we take up things online. As every other Google product are getting an overhaul, may it be Blogger, YouTube etc, it is now Google Reader which is to be placed into the factory.


As Google being the online giant, it has a huge role in setting, how things work in different circles of life, online and offline. It seemed that people in Iran were quite into Google reader. As mentioned by Amir on Amirhm.com, Iranians use Google Reader as their only source, the true one, by which they could speak out their minds to the world.


google reader overhaulAmir believes, that government has banned most of the social networks and forums, where Iranians could connect to the world and share their feelings. He mentions that other social sites like Facebook, Twitter could be easily blocked by the authorities while Google Reader was backed with secure URL beginning http, as Google reader isn't a separate domain and instead it was a Google extension, (www.google.com/reader)


Google Reader is more like a hidden social outlet to the Iranians where people like VahidOnline, with 7500 followers, share a thought which further turns out to be a popular discuss platform.


As a part of Google reader overhaul, it is belived that users would loose their friends list. For that Brett Keller has created a petition, to save the social features of Google Reader. Despite the 4000 signatures to the petition, it is hard to bias Google, which is set to promote its new social network, the Google+


Guest Post by Hassam Ahmad Awan. MBT's Gold Star Guest Author.